EONS v2.0 - Tutorial 3: create a presynaptic terminal
Introduction / Purpose:
These pages will teach you how to create a structure and associate it with a geometry, place elements on this structure and launch a simulation. The model you will create will contain one structure (that we will call 'presyn') in which you will place one calcium channel and one recording electrode. We assume here that you already completed tutorial 1 and 2. We will refer to these tutorials at several occasions.
- Action: Load E.O.N.S.. To do so, please refer to the Loading a Model section of the user reference.
- Action:Add a structure (see tutorials 1 and 2). Rename this new structure 'presyn'.
- Action:Associate an existing geometry.
To do so, click on the Associate Geometry radiobutton in the 'presyn' structure properties panel.
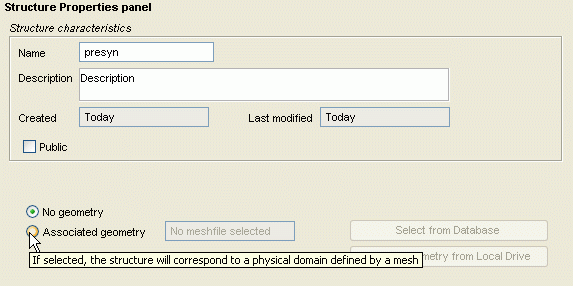
- Action:Select the geometry.
Click on the 'Select from Database' button. A list of available geometries appears. Select the 'Partitioned81nodes' geometry and click Set.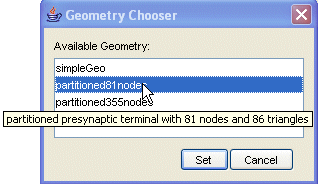 Consequence: The selected geometry appears at the bottom of the structure panel. Now that the structure has a physical geometry, it is possible to place elements on this geometry.
- Action:Define diffusion.
When we created the presynaptic structure, a default element called 'Medium' was created within this structure. This element allows us to define the different reactions that occur in the medium of the structure. In our case, let's create a variable called 'myMesh' and a reaction called 'diffusion' (see tutorials 1 and 2 for help on creating those variables).
Specify a reaction step for 'diffusion' of 0.0001 milliseconds (the calculation of diffusion must be done at a much smaller time step: 0.1 microseconds is recommended for diffusion calculations).
In this new reaction, associate the following mathematical expression to the variable 'myMesh':
myMesh = FEM_Vis ("partitioned81nodes", 0.001 , 220000, 0.001, 100 )
Check the list of functions available in EONS for explanations on the meaning of this expression.
Do not forget to click on the 'Apply changes' button once the expression has been entered.

- Action:Place an element on the physical structure.
Create an element. Call it 'ez ca channel' (see tutorials 1 and 2).
In the panel associated to 'ez ca channel', specify that this element is localized and will be associated to a specific position.

- Action:Add a behavior to 'ez ca channel'.
Add a new variable; call it 'injectedCa' (see tutorials 1 and 2).
Add a new reaction to this element. Call it 'injection' (see tutorials 1 and 2).
Specify a reaction step of 0.0001 milliseconds.
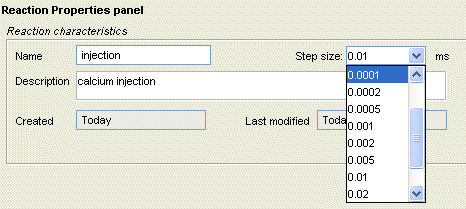
- Action:Add a recording element / place it on the physical structure.
Create an element. Call it 'electrode' (see tutorials 1 and 2 for help on creating and renaming an element).
In the panel associated to 'electrode', specify that this element is localized. Once associated to an icon, place this element at a position close to our 'ez ca channel' - let's say on node # 10 (see section 6 above for further details on how to do this).
Create a new variable called 'record10', specify its associated mathematical expression:
record10 = record (myMesh, 10)
Consequence: The element 'electrode' records the concentration in the mesh at position #10.
- Action: Create a new simulation.
Select the root model in the organization tree.
Click on the 'Add Simulation' button
Change the simulation duration from 20 to 1 millisecond.
Consequence: You just created a new simulation for your current model.
The parameters for this simulation are:- Duration: 1 millisecond
- Step size: 0.0001 milliseconds.
- Action: Select the variables to record in a simulation.
See tutorials 1 and 2 for more information.
- Action: Verify the parameters that affect the simulation output.
Modify the recording options to plot 1 point every 100 points. See tutorials 1 and 2 for more information.
- Action: Launch the simulation / Display the results.
Click on the 'Launch simulation' button located at the bottom of the simulation properties panel.
Consequence: You just launched a new simulation for your current model. During this simulation, the values of all the different variables are calculated. In the same time, the 'FEM_Vis' function displays the results of the diffusion in the presynaptic terminal.
Note: This simulation is computationaly expensive (several minutes). To decrease the computation time, the function 'FEM' can be used instead of 'FEM_Vis'. This will significantly decrease the execution time, but there will be NO real time display of the variation of concentration in the mesh.
When the simulation is over, the 'Results' window appears and displays the value of the recorded variables.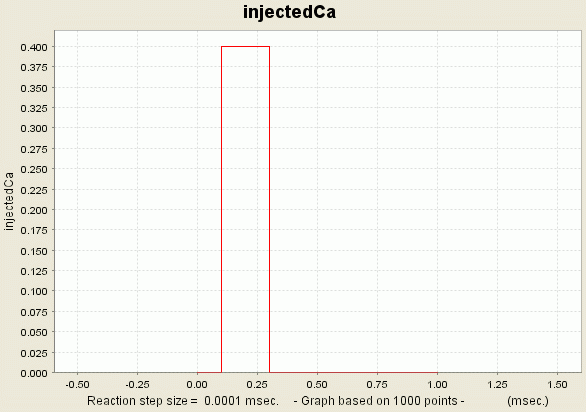
Consequence: The structure now diffuses calcium. We can focus our attention on the elements that create a calcium gradient in the structure.
In order to place this element on the mesh, we first need to associate it to an icon. Do so by clicking on the 'Associate Icon' button. Select an icon in the library of icons available and click Set. Once this is done, a picture of the icon will appear in the element panel.
It is now possible to place the element and its associated icon on the mesh. To do so, click on 'Set Position'. A new window appears in which you will be able to define the position of your element. Only positions on the nodes of the mesh are available (positions where a red rectangle appears around the element icon). Click on the position where your element should be placed - let's place it at position #03 (the node index number is indicated at the top of the window). The rectangle surroundind the icon is now green. Click on Set and Close.
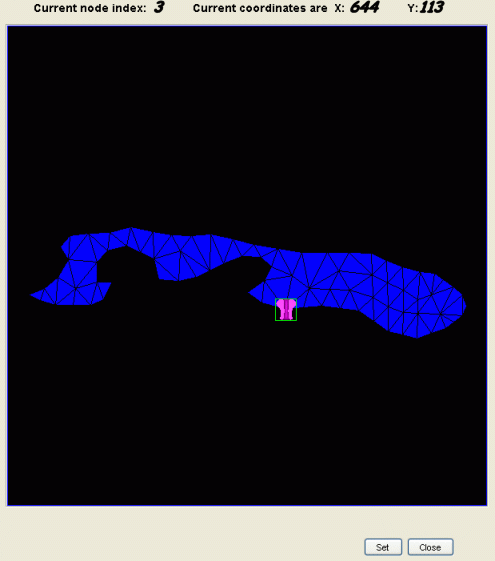
Consequence:The element has now a specific position. This position is available in the properties panel of the element:

Associate the following mathematical expression to the variable 'injectedCa':
injected = tempInject (myMesh, 3, 0.4, 0.1 , 0.2)
Check the list of functions available in EONS for explanations on the meaning of this expression.
Do not forget to click on the 'Apply changes' button once the expression has been entered.

Consequence:We now have associated a simple behavior to the 'calcium injection' element.
Note: The variable 'myMesh' is a vector that contains the concentration values for every node on the mesh. Enabling its recording does not generate any output.
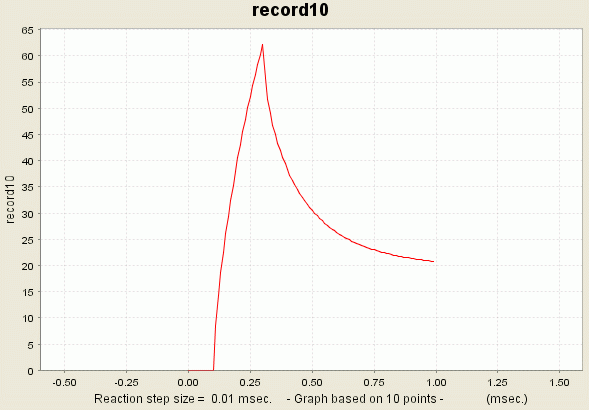
You can access the data if you right-click the plot and select the option 'View Dataset'.
Conclusion:
Congratulations, you are now capable of:- Creating a complex model containing several elements and a structure based on real physical geometry
- Calculating the diffusion of molecules in the 2D physical geometry.
This page was last updated on Apr. 18, 2006.